Ingredients
Method
Make the batter
- Whisk together the egg, melted butter, milk, and vanilla in a bowl.
- Add the flour, sugar, baking powder, and salt.
- Mix until smooth—no lumps.
Divide the batter into four parts
- Keep two portions plain (this will be your filler batter).
- Add cocoa powder to a small portion for the outline batter.
- Tint one or more portions with food colouring for the detail batters.
Fill your tools
- Pour each batter into separate squeeze bottles.
- If using ziplock bags, snip a tiny hole at the tip for better control when drawing.
Heat the pan or griddle
- Preheat a non‑stick pan over medium heat or set your electric griddle to 375°F. Lightly grease the surface if needed.
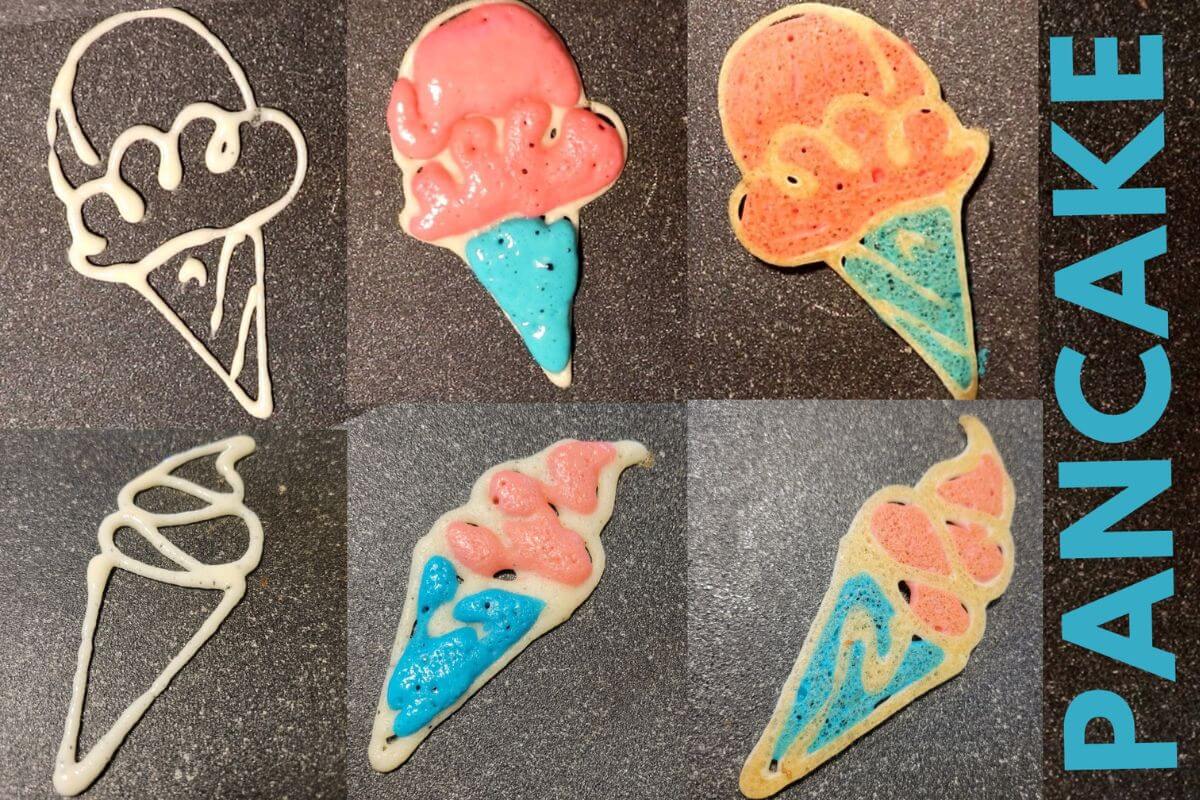
- Create your design. Start by drawing the outline using the cocoa batter.
- Add coloured details on the inside.
- Finish by filling the shape with the plain batter in a thin, even layer.
- Let the pancake cook until bubbles form on the surface and the edges look set.Flip gently and cook the other side until golden.
- Repeat with remaining batter, then serve warm with your favourite toppings.
- Tip: Colours will soften or dull slightly as they cook, so use bright or neon shades for best results.